
How to Preserve Dried Flowers in Resin
This article contains some affiliate links, and I will make a small commission if you click on the link and make a purchase.
Rose and Gerbera Daisy in Resin (this one is available)
I LOVE flowers! I love looking at them, I love painting them, and I love receiving them most of all!! People give flowers for all kinds of reasons, or no reason at all other than to brighten someone's day. I always say getting flowers for no reason at all is the absolute best, but to be honest…I love getting them no matter the reason! The biggest problem (or only problem in my opinion) with fresh flowers is that they will eventually wilt. Well, if you are like me and want to preserve flowers from special occasions (or just because they are beautiful) this solution is for you, and this is how it all came about….
I knew I was going to want to preserve my bouquet from my wedding. A few months before my wedding, I started looking at different options for this, and stumbled upon some Etsy sellers that would preserve dried flowers in resin and I absolutely LOVED them! But me being me decided to take on this endeavor myself (since I do some resin work already). I bought all of the supplies that I would need beforehand and was ready to get to work the day after the wedding since we were leaving on our honeymoon 2 days later. Once I prepped all the flowers, I got most of them in the silica gel beads but decided to leave a few out and dry them the “old fashioned” way… hanging upside down, just as a backup incase the ones in silica did not turn out. It was about a month before I was able to circle back around to work on them again, and I ended up making 2 different designs. An “H” - for Horton and a hexagon. In the H I used the air-dried flowers and added some LED string lights. And for the hexagon shape I used the flowers dried in the silica gel beads and I threw in some pearls and bling from my hair piece that I wore that day. I also had a base to put this piece on that had a light in it, so it could really be a display piece. Both of these pieces turned out AMAZING!! What do you think?? Let me know in the comments below!


I was so pleased with how they turned out I had to show them off online… well a good friend of mine who was about to get married, saw them and fell in love with what I had done… so this got me started on the next one. She had such a beautiful bouquet of spring flowers and we decided to add some of the special green stones that were a part of her table centerpieces!! Since I knew I was going to be doing this, I came prepared and put her flowers in the desiccant that night after the wedding. This is how they turned out…


I didn’t do any more flowers in resin until my Nana passed away August 10, 2022. I decided it would be great to do something like this for all of the “cousinettes” and her daughters (my Mom and Aunt). Nana was such an amazing woman. She was strong, independent, caring, smart, funny, hardworking, silly…. the list goes on and on. She loved God, loved her family, and loved to laugh! Nana taught all of her grandkids (16 of us) how to be like her. And let me tell you, all of us are pretty headstrong! But Nana was so special to all of us, she would always tell you that you were her favorite and turn right around and tell the cousin next to you that they were her favorite! I consider myself blessed to have had her in my life… BEST NANA EVER!!
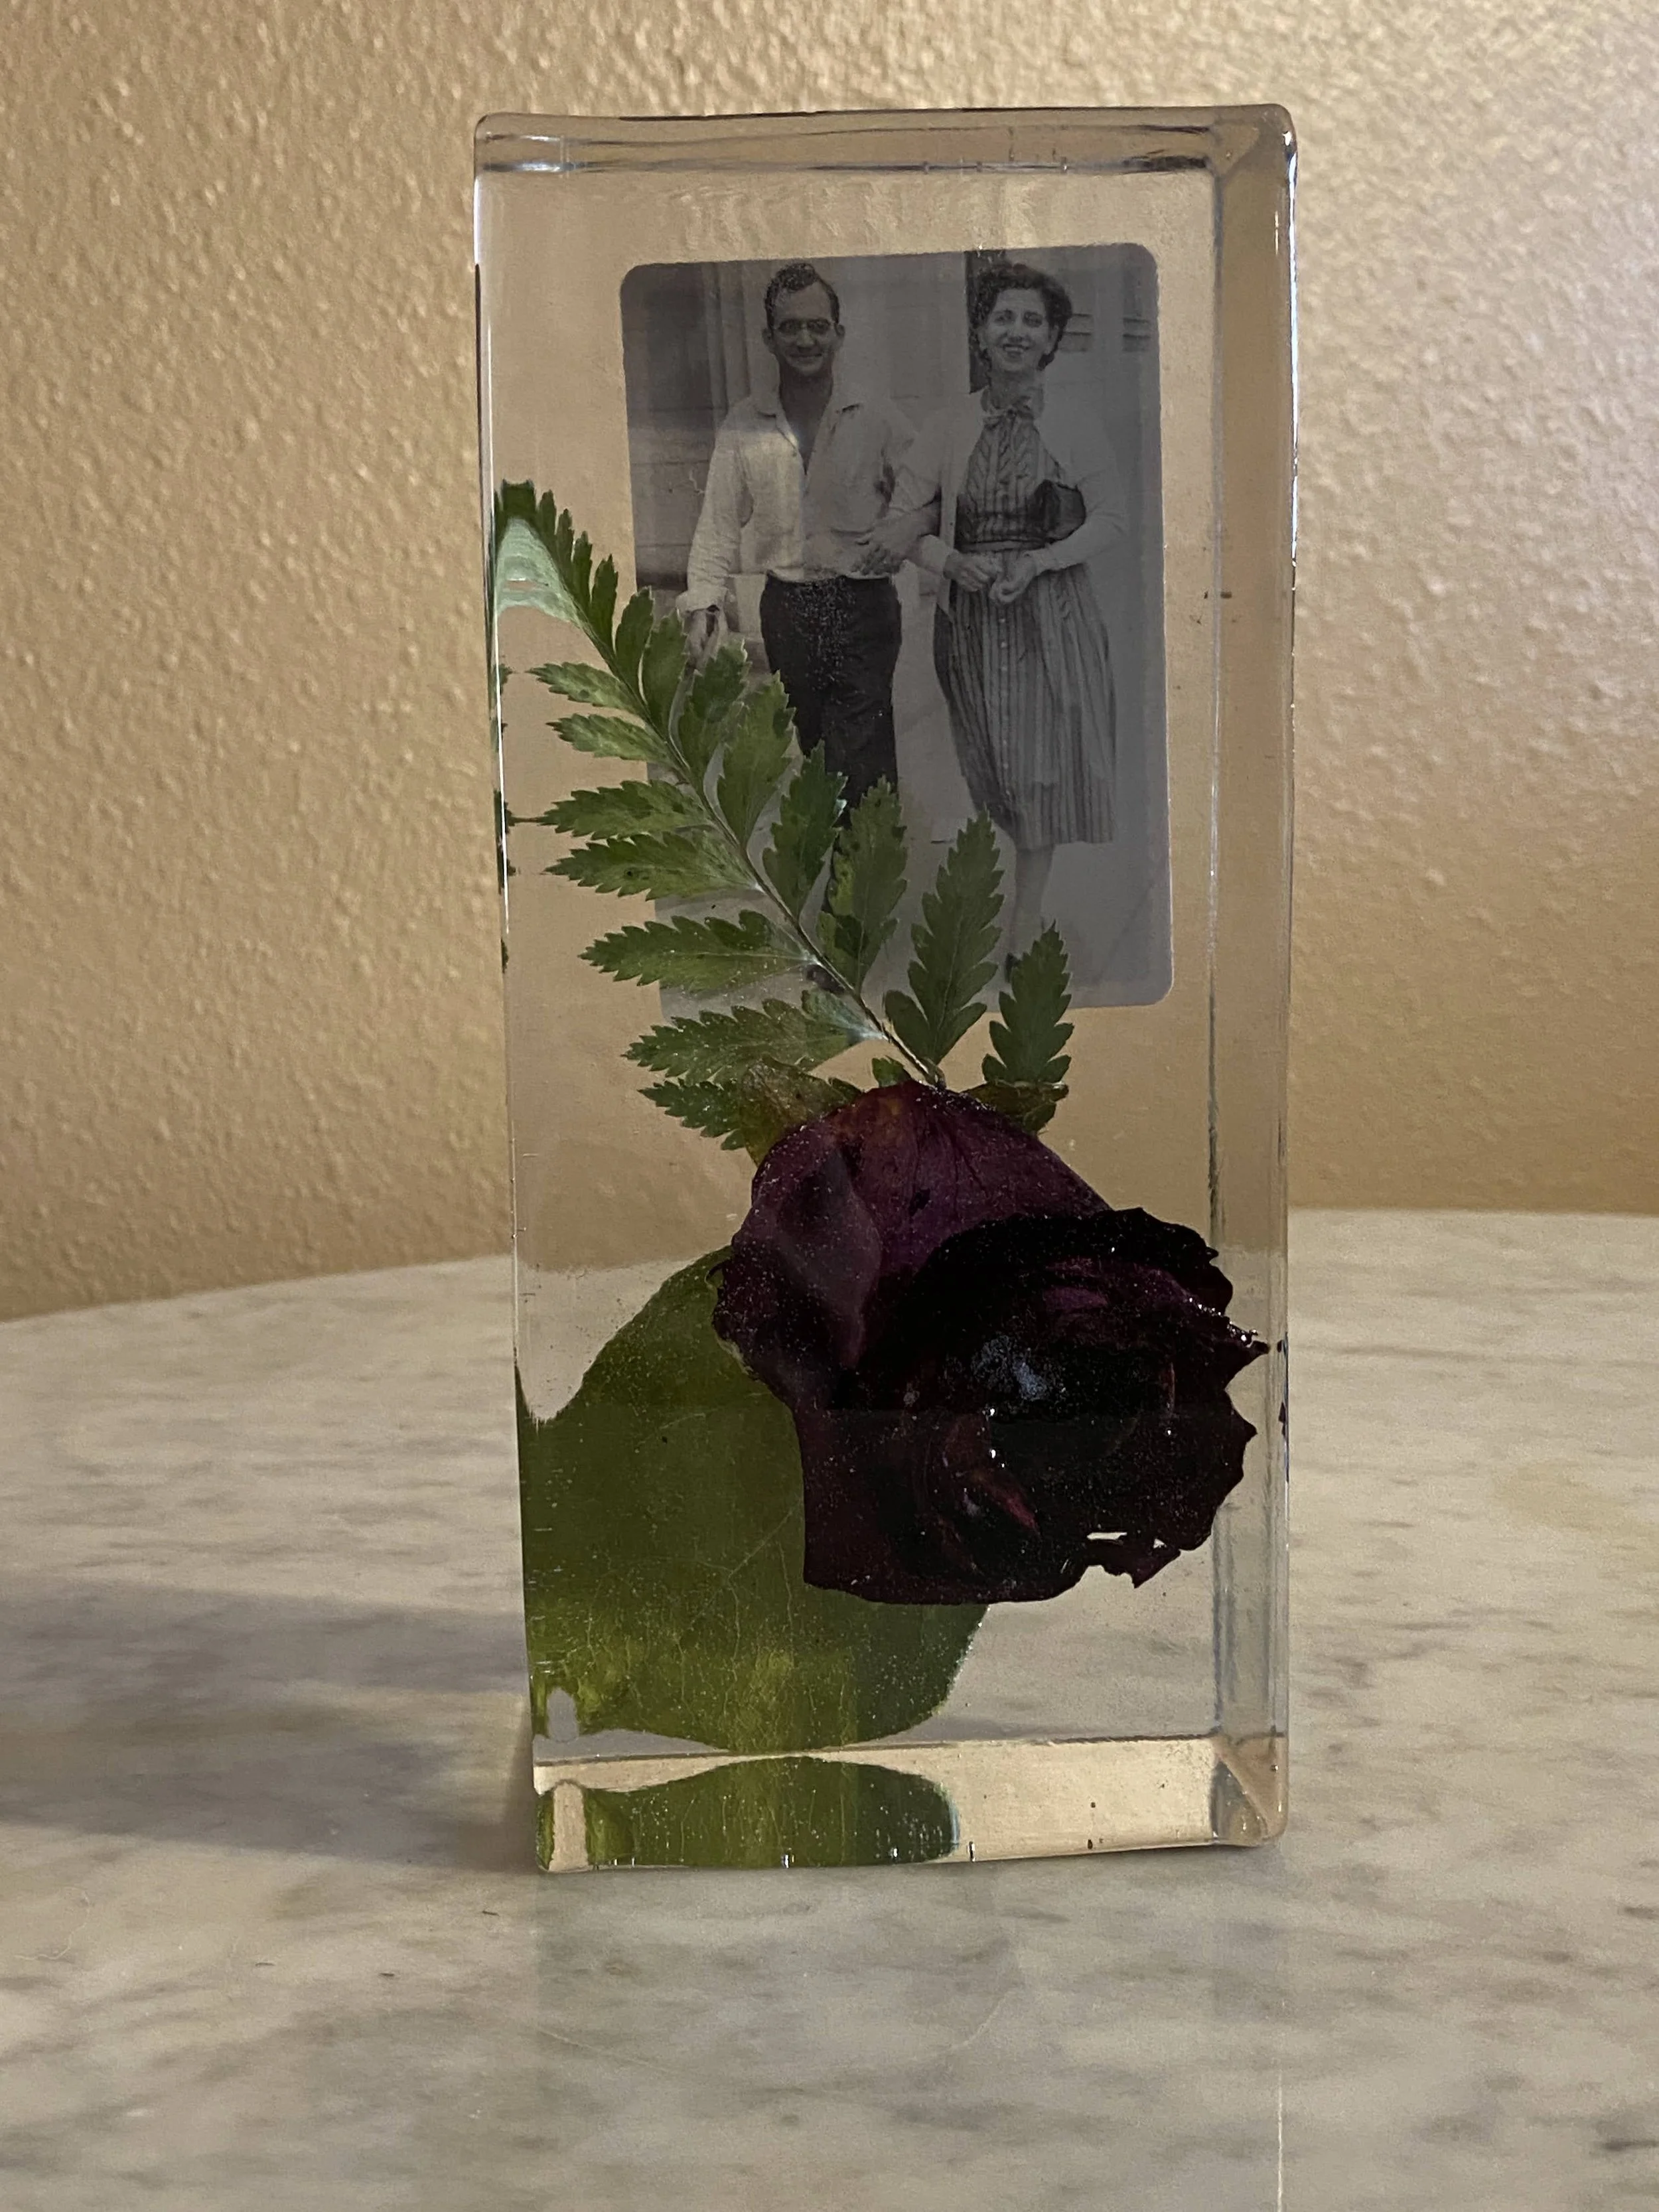
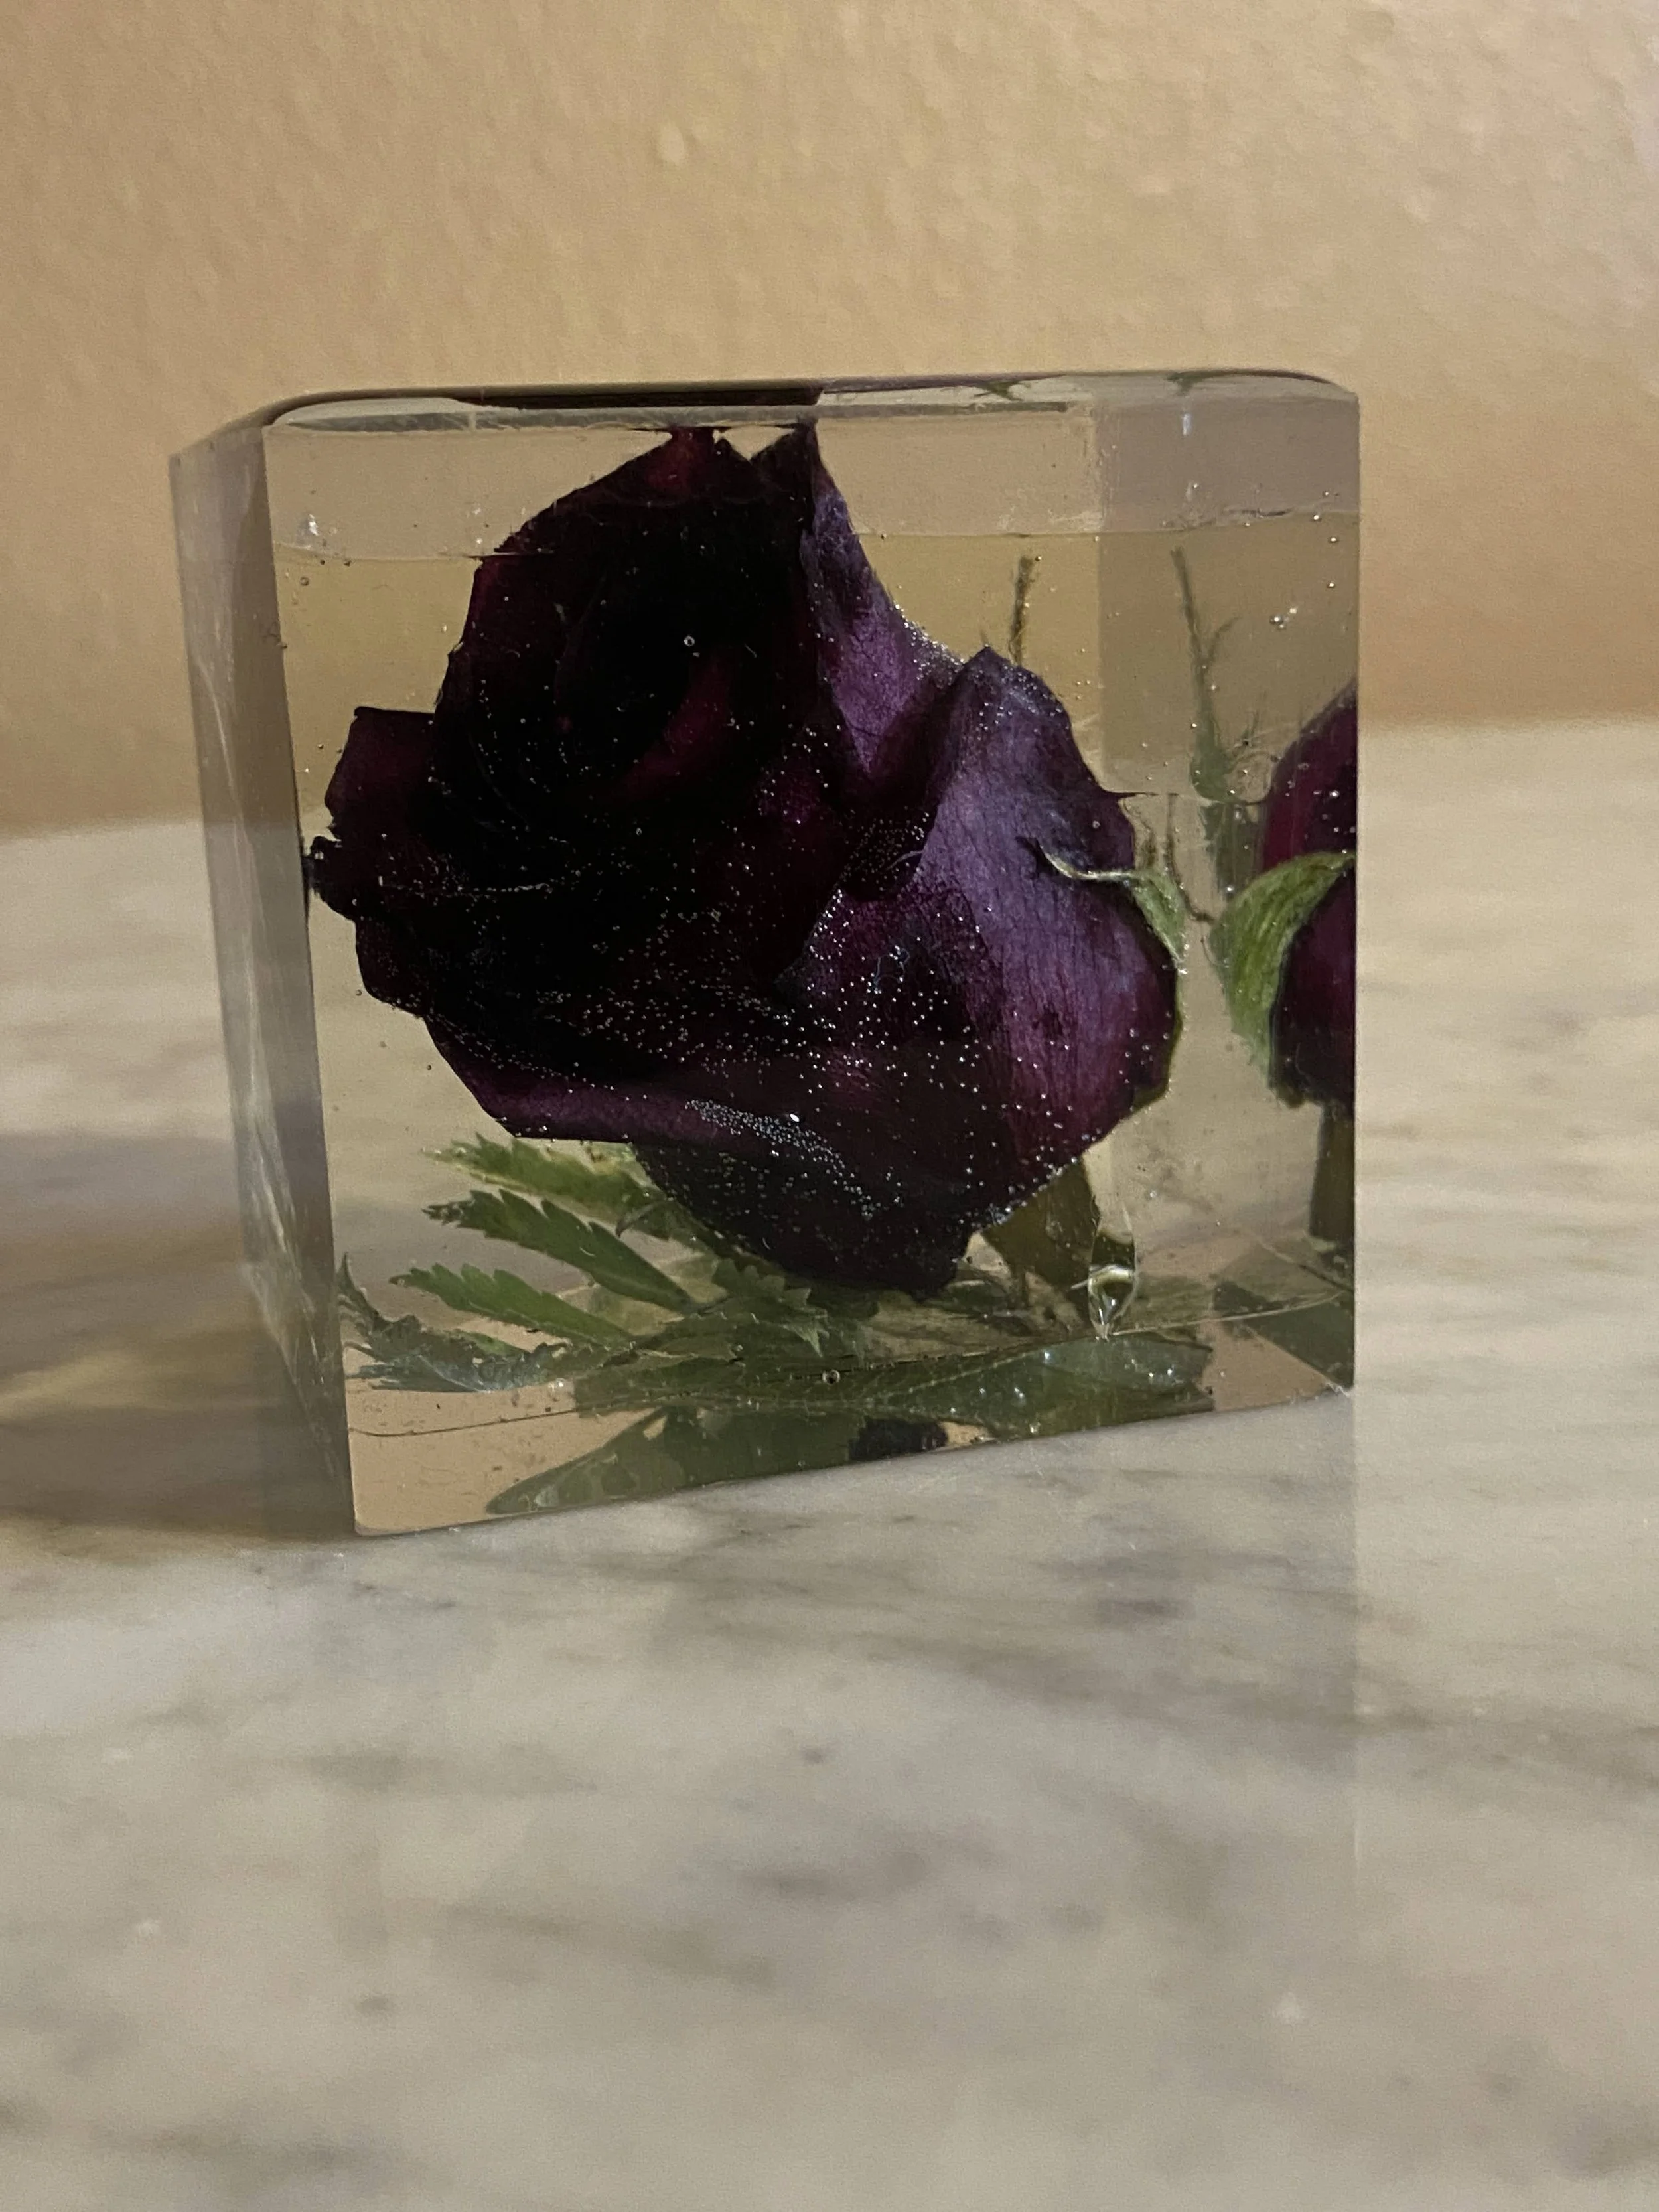
After her funeral service I took 18 roses from the spray of roses (these were extra special, because she picked them out) that were on her casket. I dried them in silica gel beads that evening. I talked with each cousin and found out what they wanted in their flower display which I call “Nana’s Flowers”. Some wanted it very simple, with just one rose, and others wanted pictures and different trinkets (including her rosary from her 1st Holy Communion, some of her pins, and several different pictures) of hers along with the roses. I had to be just a little different and added a little white sparkle mica powder in my resin mix to give it a little subtle “bling”, which was totally Nana- the bling not the subtle!! I ended up making 12 different pieces, which was quite a task, but I couldn’t be happier how they turned out! We are just a few days away from Nana’s birthday, and all of the cousinettes will have their flowers by then. I believe you call that perfect timing. Which one is your favorite? Let me know in the comments below!


I get asked a lot how I do this, so I thought would give you a step-by-step on how I create these beautiful pieces of art.
Make sure you have your supplies before getting your fresh flowers. This includes the desiccant (silica gel beads) and an airtight plastic container (maybe more than one). There are many brands of silica gel beads and ones that are specifically for drying flowers, I use Activa Flower Drying Art Silica Gel from Michaels. Works great for me and it is re-usable. You can find large plastic food storage containers at Dollar Tree for a decent price, or just use some old ones you don’t need anymore.
Pour a thin layer of silica gel on the bottom of the plastic container.
Cut your flowers and leaves. I try and cut as much of the stem off as possible, without making the flower come apart. You need to cut your flowers while they still look pretty! How they look when you put them in the desiccant is how they will look when they are dried.
Place the cut flowers on top of the silica gel and carefully pour more desiccant over the flowers. Be sure to pour slowly so you do not ruin the shape of the flower and make sure it is covered completely.
Seal up your container and wait…. for 2 weeks. The directions on the desiccant state you can leave it for 3-4 days, but larger flowers can take longer to dry out, so I prefer to leave it for 2 weeks.
During this wait time, you can make sure you have all of the right supplies for the next step. Which includes resin epoxy and silicone molds. The mold you can get from almost anywhere and they come in almost any shape or size. I guess that goes for the resin too…but I prefer to us Upstart Epoxy. They have a great product and are American made! For this type of pour I use Art Resin Epoxy and Deep Pour Epoxy (you can use Table Top Epoxy in place of the Art Resin). You will also need something to get rid of air bubbles, I use either a mini heat gun or a butane torch (but you have to be extremely careful with this, you can burn the flowers or your silicone mold).
Once you know your flowers are nice and dry. Gently pour out the silica until you can pull your flowers out. Be GENTLE here…the flowers are dried and can be a little brittle. For each flower you need to get as much of the silica out as possible. I usually turn them upside down and gently tap my wrist to shake out the stuff loose. I also have a very soft makeup brush to brush away some the beads that are stuck on the petals.
Before committing to the resin, I like to figure out how I am going to arrange my design. I draw the shape of the silicone mold on a piece of paper and try different layouts of the flowers. When you decide what you like take a picture so you can refer back to it. You can practice the design straight in the mold, but it can leave bits and pieces on the silicone, and you have to clean it really well before using it… so I’m not sure if that make me lazy or it’s a work smarter, not harder thing!
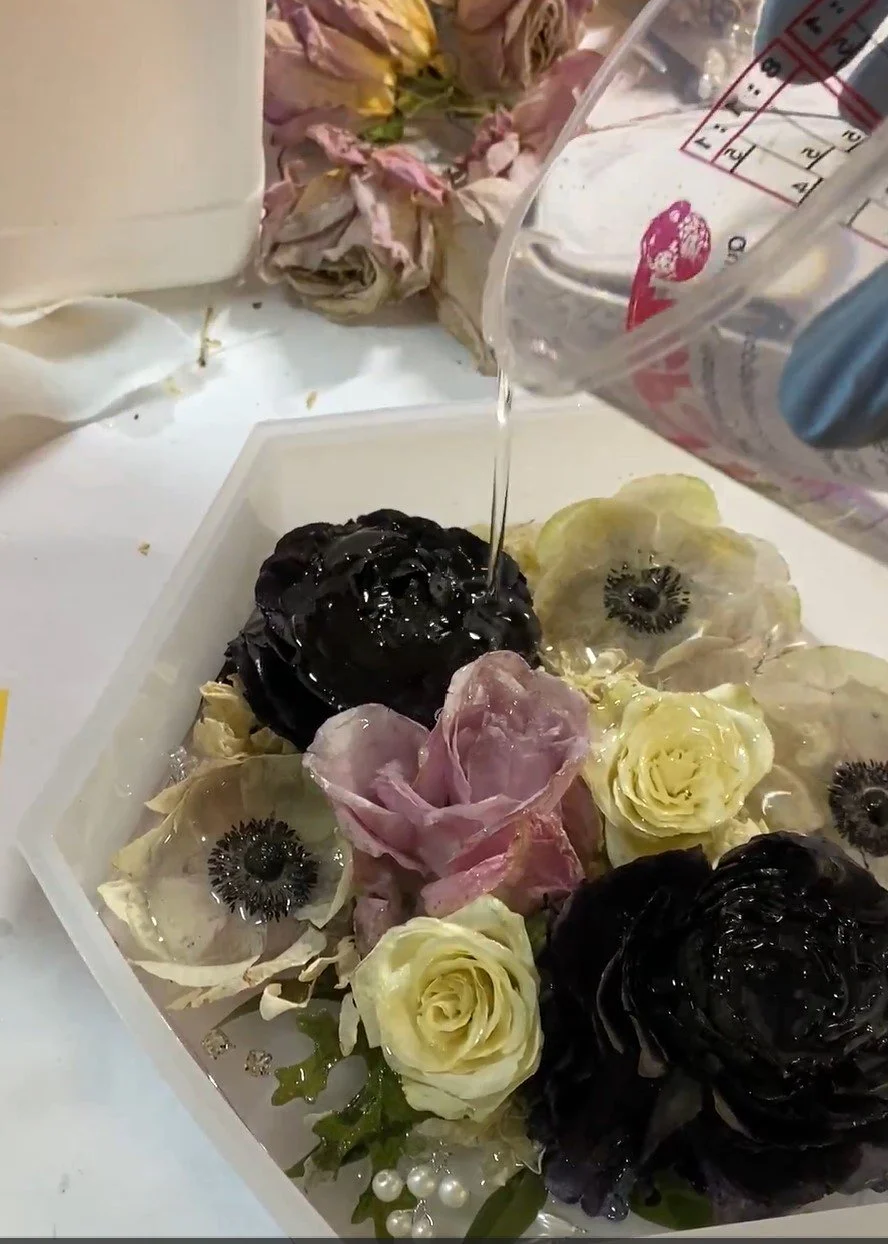
Now that you have the design… the fun can begin. Flowers tend to float so I will mix a small amount of ART RESIN (1:1 ratio) and pour in the mold (do not pour more than 3/4” of this type of epoxy), take a small stir stick and make sure you run it on all the corners to get rid of hiding air bubbles, this is also where I use my mini hot air gun to remove air bubbles from the surface. Place all of your flowers and leave and any other items you will be adding in your design. You have about a 35 min window of working time with the ART RESIN. If I have a little resin left over and have not reached my maximum depth, I will pour some over the flowers. I usually go back and check the design a few times over the next hour to remove any air bubbles with the heat gun. **Be sure to work on a level surface, this epoxy is self-leveling.
After this has set for at least 4-5 hours (can be longer) you can move on to using the DEEP POUR EPOXY. This is mixed in a 2:1 ratio and you can pour it up to 2”. At this step I will mix enough to cover all of the flowers. (Upstart Epoxy has a Coverage Calculator to help figure out how much you need to mix.) Make sure you pour it slowly and pour inside all of the flowers. You will need to check this several times over the next several hours for air bubbles coming to the surface. They are easy to get rid of with the heat gun. This takes 2 days to cure, so I will wait at least 48 hours before moving to the next step. Although if your mold is really deep or you need to cover more flowers you can repeat this step after 24 hours of the layer of Deep Pour Epoxy, then wait 48 hours before moving on to the next step.
BONUS TIP: If at any point between epoxy layers you notice air bubbles at the top of the resin that has already cured, take a small, pointed object (I use the tip of pointed tweezers) and ream out the hole slightly. Then when you pour the next layer, use the same pointed object and poke it in and out of the air pocket to fill it with resin. It will practically disappear! Make sure to use the heat gun after this to get rid of the air bubbles that have floated up after filling the pockets.
Once the epoxy is cured it’s time to de-mold!! Larger molds tend to be easier remove than smaller ones. Just peel back each side and push from the bottom and your piece will come out. If you have a smaller piece and are having difficulty removing it from the mold, put the piece under running water while you release the sides and pop it out.
The top of your resin block will have a concave shape and possibly sharp edges. I use 180 grit sandpaper on a block to sand down the sharp edges till it is smooth and almost even with the top of the resin block. Make sure you clean all of the dust off before moving to the next step.
Now to finish off the piece and give it a showroom shine! Mix a very small amount of Art Resin (or Table Top if that is what you are using) and pour on the top of the resin block. Using a small stick push the resin to all of the edges. You will end up with a slightly convex top.
Let it cure for 24 hours. Your piece is done! It will have a beautiful shiny finish!
Drying the flowers in silica gel beads preserves the flowers to look like they are still alive. The dried flowers look so life like and the only difference you can see would be a color shift in a few of them, the biggest one for me is reds can sometime look darker, but I still feel that it is beautiful. You can see in my wedding bouquet of flowers, the maroon ranunculus became very dark, but I love the contrast!
**If you choose to preserve pressed flowers or flowers that were hung and dried skip to STEP 6 the only thing you have to make sure of is that the flowers are completely dried out… if they have any moisture in them, they will mold inside the resin and your piece will be completely ruined.
***If you decide to add any paper, pictures or material they need to be sealed, otherwise they will absorb the resin and become wet. If you are ok with that look then go for it, but I prefer to seal up the surfaces before I add them into resin. There are a few options for this: 1. You can use a Spray acrylic sealer. 2. You can use ModPodge. I prefer to use the first option because it leaves a smoother surface. That is what I used on the pictures that were added into “Nana’s Flowers”.
Be creative with this! Adding sentimental items along with the flowers can make this piece so much more special! I hope this step-by-step process helps you to create your own masterpiece! If not, you can always find someone to do it for you (yes…I am talking about me).
Please let me know if you have any questions, I will be happy to answer them for you!
Would you like to have VIP access, see live demos, and get some free art? Click this button and join my VIP art group, Art by Kris Horton - Kris’ Artworks